Table of Contents
This documentation provides step-by-step instructions on how to add IELTS courses to a WordPress page using shortcodes. Shortcodes are specific codes that allow you to embed files or create objects that would normally require lots of complicated, ugly code in just one line.
Step-by-Step Guide #
Step 1: Navigate to IELTS Admin Panel #
- Log in to the IELTS Platform:
- Open your web browser and navigate to the IELTS platform.(https://yourwebsite.com/ielts-admin)
- Log in using your admin credentials.
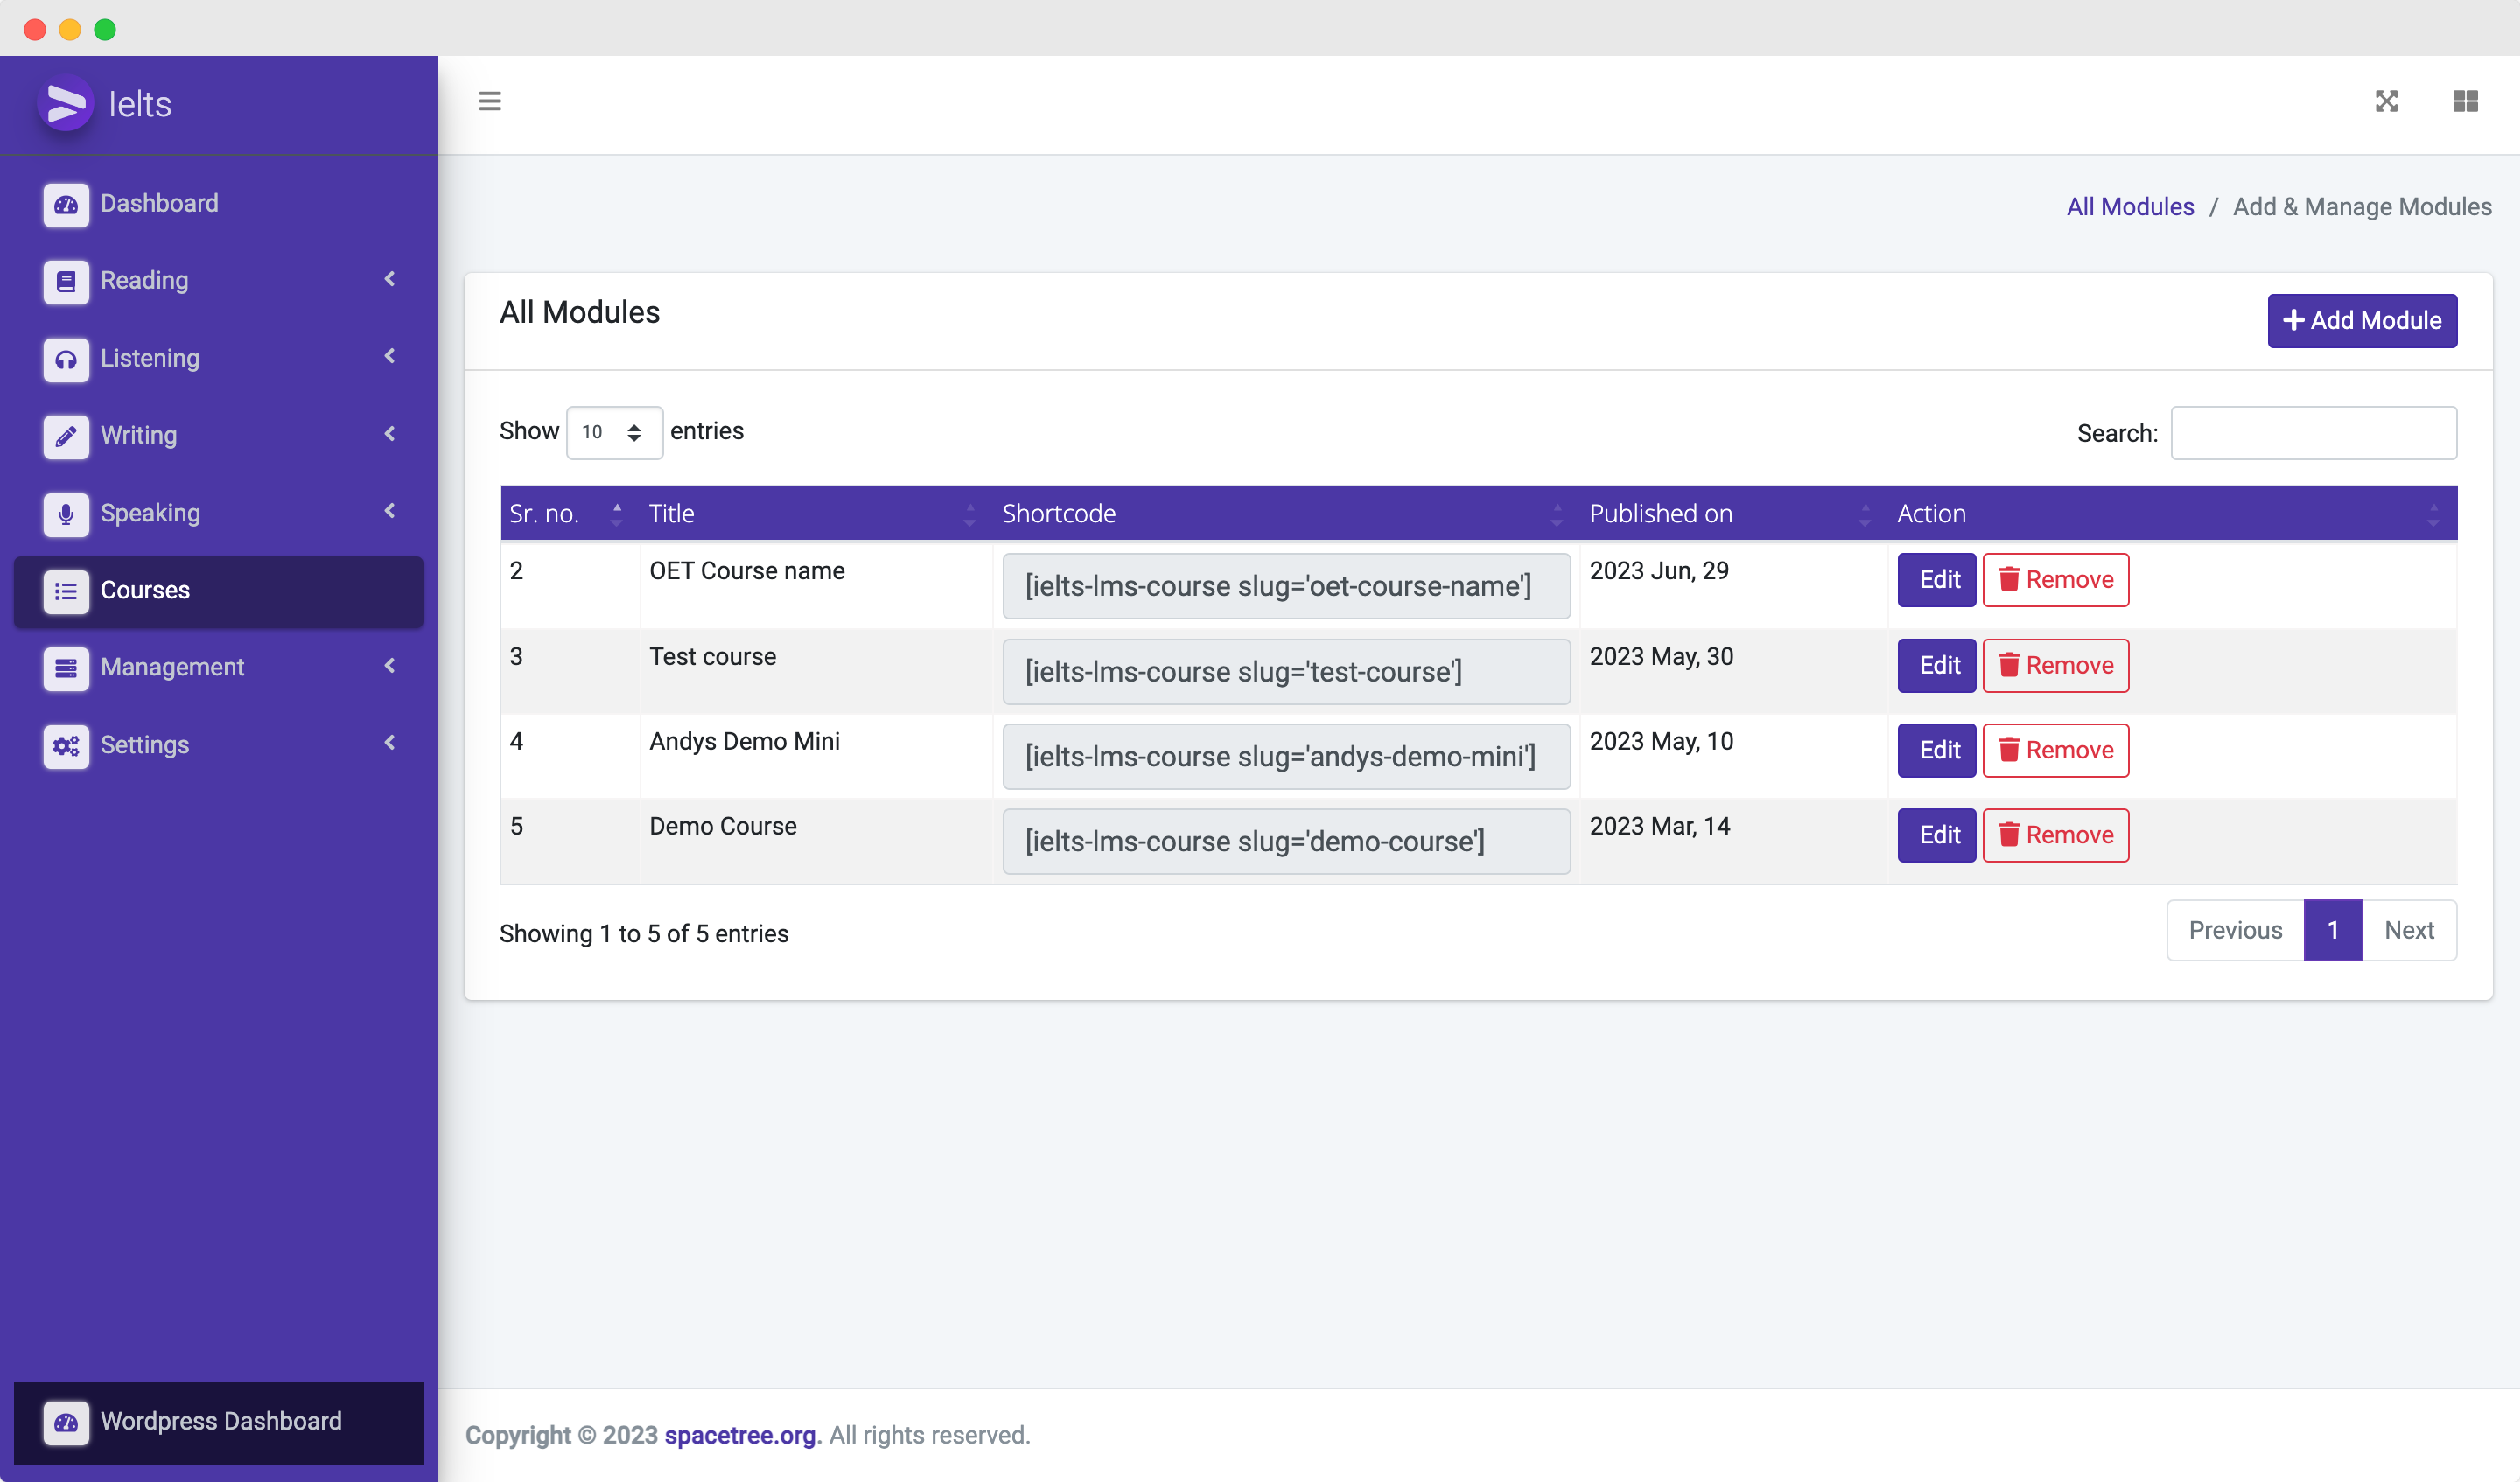
- Navigate to Courses
- In the admin panel, click on the
Coursessection in the sidebar.
- In the admin panel, click on the
Step 2: Copy the Shortcode #
- Select the Course:
- In the
Coursessection, locate the course that you want to add to page.
- In the
- Copy the Shortcode:
- Every course will have an associated shortcode. Find and copy the shortcode related to the selected course. The shortcode would typically look something like
[ielts-lms-course-slug="test-name"].
- Every course will have an associated shortcode. Find and copy the shortcode related to the selected course. The shortcode would typically look something like

Step 3: Create a New WordPress Page #
- Log in to WordPress Admin:
- Open a new tab in your browser and log in to your WordPress site with admin credentials.
- Navigate to Pages Section:
- On the WordPress dashboard, hover over the
Pagesmenu on the left sidebar.
- On the WordPress dashboard, hover over the
- Add New Page:
- Click on
Add Newto create a new page.
- Click on
Step 4: Add Title and Paste Shortcode #
- Enter Page Title:
- On the new page screen, enter a title for your page in the title field.
- Paste the Shortcode:
- In the content area, paste the previously copied shortcode from the IELTS platform.
- Publish the Page:
- Once the shortcode is pasted, review your page and click on the
Publishbutton to make the page live.
- Once the shortcode is pasted, review your page and click on the


