
How to Login on Website as an Admin/ a student ?
Step 1: Open your website Domain
Step 2: Click on the Sign in option on the top right ( For both admin/ student)

To open the admin Dashboard, hover over the website name on the top left and click on Dashboard.

Step 1: Go to admin Dashboard
Step 2 : Hover over the user option and click add new.
Step 3: Fill up the required fields (Username & Email)
Step 4: Choose role as a subscriber.
Step 5: Click on add new user button.

How to assign a course to the added/registered ? student
How student will give the access the course?
Step 1: Sign in as a Student
Step 2: Click on my courses (Menu option on left sidebar)

How to see the scores of Students?
Step 1: Go to admin Dashboard
Step 2: Hover over user and click on all users

Step 3: Hover over the student’s name you wants to see the result of and click on edit.

Step 4: Click on statistics option, in a course info section, to see the detailed reporting.

How to Integrate Zoom API with Website?
How to add Live Classes on your Website?
Creating Your First Course?
- Navigate to IELTS LMS > COURSES
- Click the “Add New” button at the top of the page
- Click the “Builder” tab in the top navigation bar

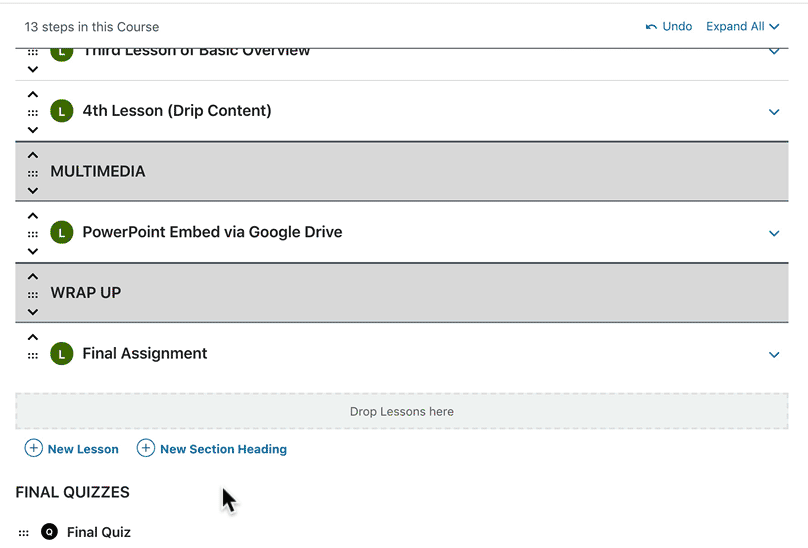
Course Builder Overview
At the top of the course builder, you’ll see:
- The total number of steps in the course
- This is comprised of all lessons, topics & quizzes that have been assigned to the course
Add Content to Your Course
Lessons
Aside from section headings, lessons will likely be the first type of content you’ll want to add to your course. You can create brand new lessons directly from the course builder, or add existing lessons that you’ve already created. Let’s take a look at each.
Create New Lessons
- Click the “New Lesson” link
- Type the name of your lesson
- Press ENTER, or click the “Add Lesson” button
Edit a Lesson’s Content
If you’d like to edit the content within a lesson, you can click the blue “Edit” link that appears when you hover over a lesson.

Video Progression
Video progression is a way to require users to watch the entirety of a video before they can mark content as complete. It can be used for both lessons & topics, and works the same way for both.
This guide will walk you through the settings of video progression and explain how it works.
How to Enable It

- Navigate to a lesson or topic edit screen in the admin
- Video progression is found on the Settings tab, under Display & Content Options
- Toggle the switch to turn it on
- Configure your settings (which we’ll discuss below)
Supported Video Providers
The video progression feature supports the following video providers:
- Vimeo (
vimeo.com) - YouTube (
youtu.beoryoutube.com) - Wistia (
wistia.com)
NOTE: Requires this additional Wistia plugin. - Spotlightr (
spotlightr.com)
NOTE: formerly vooPlayer - Amazon S3
Display Timing
This setting determines when your video will be shown to the user, and how to handle sub-steps associated with the lesson/topic.
- Before completed sub-steps (default)
The video will be shown immediately and must be fully watched before the user can access any of the lesson/topic’s associated sub-steps (topics and/or quizzes). - After completing sub-steps
The video will initially be hidden. It will become visible after the user has completed the lesson/topic’s associated sub-steps (topics and/or quizzes). The entire video must be watched in order to complete the lesson/topic.
The next 3 options only appear if you’ve chosen “After completing sub-steps.”
IMPORTANT
Video progression logic (i.e. auto-completion, completion delay and disabling mark complete button) will not be applied if you are logged in as Administrator and the Bypass Course Limits option is active.
Lesson/Topic Auto-completion
Enabling this option will automatically mark the lesson/topic complete once the user has watched the entire video.
Completion Delay
This refers to the delay (in seconds) between when the video is finished and when the lesson/topic is marked complete.
- Default is no delay (
0seconds)
Mark Complete Button
By default, the “Mark Complete” button will be hidden, but this setting allows you to display it.
- Simply enable this setting to show the “Mark Complete” button
Autostart
Enable this setting to have the video automatically start playing on page load.
Due to browser policies to prevent unwanted ads from playing automatically, videos with autoplay or autostart enabled will play with the volume muted. Since this is now the default behavior for most browsers, make sure that the controls are enabled on your video so that your users will be able to unmute them.
If controls are hidden, including the pause/play button, autoplay must be enabled for the users to be able to watch the video. Depending on the video host, the volume controls may still work with keyboard shortcuts (common ones are the “M” key, the “+” or “-” keys, or the up and down arrow keys). Check out this help article from Youtube on their player’s keyboard shortcuts.
On the browser’s end, there may be different ways around it depending on the browsers that your users are using. Here are a couple of resources that you can check for Firefox and Safari. Although there are no known solutions to go around this for Chrome users, here’s the official documentation for the policy change from Google, in case you want to read more about it.
NOTE
It is still possible for the user’s default browser settings to override this feature and prevent autoplay completely, whether muted or not.
Video Controls Display
By default, video controls are hidden from the user. Video controls include play, pause, volume, closed captions, and other settings found at the bottom of a video.
Enabling “Video Controls Display” will show all of these controls to the user, and allow them to have more control over the video.
NOTE
This feature is only available for YouTube & local videos.
Other Video Options
Because IELTS LMS is built on WordPress, there are other ways to display videos to your users. You don’t have to use video progression in order to use videos for your course. You won’t have all the same options as the video progression feature provides, but you can use any method you’d like, including:
- embed any type of video anywhere within your lesson or topic page content
- use third-party WordPress plugins for displaying video and/or playlists
- use H5P, Adobe Captivate, or any other platform to create/embed video content
How to check the submitted essay?
- Navigate to IELTS LMS > Tests
- Click the “submitted essays” tab at the top of the page.

How to see the Tests Statistics?
Step 1: Navigate to IELTS LMS > Tests
Step 2: Hover over a quiz you wants to see the stats of
Step 3: Click on statistics

You can report the filters by specific user, date or number of entries.

Step 1: Navigate to IELTS LMS > Groups

Step 2: Click on add new on the option available on the top right.

Step 3: Name the group under the group page tab.

Step 4: Add the courses to the group under the courses tab.

Step 5: Assign student and group leader under users tab.

- Navigate to IELTS LMS (Learndash) > Courses